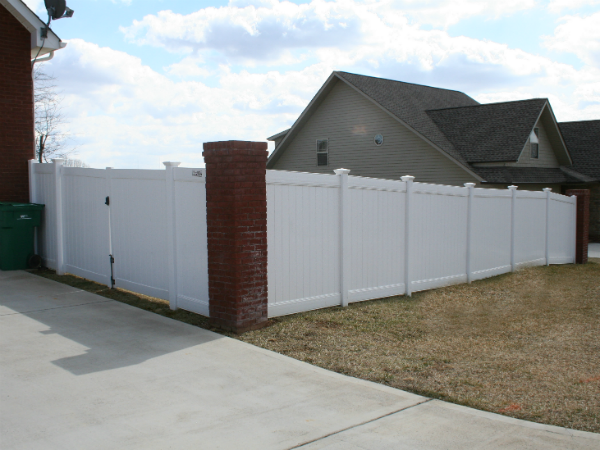
Vinyl Fence Foundation
Your fence foundation is crucial! Everything else is built on the fence foundation. So whether you choose the newer method of driving steel reinforcement posts deep into the ground or the traditional method of digging the hole and setting the post with 100% concrete...make sure this part is right!
The most important part of any vinyl fence installation is how the posts go in. Below we explain the two ways we handle vinyl fence post installation, then walk through the rails, pickets, gates and caps.
Vinyl Fence With Metal Posts (Steel Post Reinforced)

Pile driving 2" industrial galvanized post makes the strongest vinyl privacy fence post. Steel posts are pile-driven 3' to 4' deep into the ground leaving about 4' to 5' above ground. Next, we screw-on black adapter connectors leveling across each line. Since these connectors are elliptical on the inside, they can be rotated to keep a straight sightline. The outside of the connector is round and the square vinyl post will connect with color-coated stainless steel screws at the middle of the vinyl post on each face.
Premium vinyl posts are then sleeved over top and attached with screws. This system originated in Canada as a solution for fencing with deep frost lines. Using concrete in these deep freeze areas up north resulted in frost pushing concreted posts out of the ground.
This is a great installation method with minimal disturbance to the yard. Gate posts (aluminum I-beam stiffeners) are still set with concrete.
This method is also great for use in disturbed soil (loose soil) from backfill or sandy soil. When installing around a swimming pool area that is backfilled, we use 12' posts and drive them 8' deep to reach solid ground. Just installing concrete on disturbed soil will not cut it. When the ground settles, the concrete will be exposed. I have even seen fencing fallen over, concrete intact, just because there was no soil to hold it up.
A steel post for vinyl fence installation also means the vinyl post itself carries no load. The steel does the work, and the vinyl sleeve keeps it looking clean and maintenance-free.
Setting Vinyl Fence Posts in 100% Concrete
This is a great way to set your vinyl fence posts, especially for picket fencing and small privacy fencing. Dig the holes 18" to 36" depending on the fence and the amount of wind expected. Pour in 100% real concrete (NOT A SKAT MIX) and tamp in place. After you set the total fence and made adjustments, take a 5-gallon bucket of water and pour it in half per post on all the fence posts. Allow the water to sink in, then repeat.
Vinyl Fence Framework
Once the posts have been set, simply insert prebuilt picket panels (rails) into post slots and secure them with colored stainless steel screws. The stainless steel screws don't rust like other screws. They will also keep the pickets vertical. By using the stainless steel screws, you can easily remove a section if needed.
Installing on Level Grade
Our premium vinyl picket fencing is designed to rack up to 12". That means, for level property to a slight grade, the fence section will shift or RACK. Rails will follow the contour of the ground while the pickets remain vertical. Have you ever seen a cheap vinyl glued panel at an angle up a hill? This is a terrible installation and that reflects on the homeowner as well.
Installing on a Hill
We OWN the FACTORY! So we build our premium vinyl picket fencing in 3-grade slopes to handle almost any terrain: Normal slope, moderate slope, and severe slope.
Vinyl Fence Pickets
Pickets are already installed in the sections and come in widths of 7/8"x 3", 7/8" x 1-1/2", or 1-3/8" square.
Vinyl Gates
Our installed premium vinyl gates are warranted by us for a FULL five years labor and material warranty! How can we do this? We OWN the FACTORY!!! We warranty our installed premium vinyl fence gates for 5 years, meaning that we use the correct materials, install them correctly, and service them if there is a problem.
Vinyl Fence Post Caps and Finials
After installing the vinyl posts and sections of the vinyl gates, the last part of the installation is for the post caps and picket finials. There are lots of vinyl post caps available to tweak your fence, but we have found the most durable (reliable) and popular vinyl post caps to be Gothic, New England, and Pyramid Caps. There are lots more other caps available, but these seem to hold up the best.
Picket finials are picket caps that are glued to the top of pickets for a finished look. Be sure you have an easy source for these or keep extra for replacement. Since they are glued on, they can be knocked off and need replacing. What knocks off the finials? Baseballs, footballs, tennis balls, dogs, tree limbs .... having some extra on hand is a simple task to replace when it happens.
So there you have it: The installation of a premium vinyl fence.
How to Install a Vinyl Fence Post: Quick Checklist
- Call 811 before you dig so utilities are marked.
- Run a string line and mark post spacing to match your panel width.
- Set corner and end posts first, then line posts to the string.
- Use a driven steel post or 100% concrete, never a dry sand-and-gravel "skat mix".
- Check every post for plumb and height before the concrete sets.
- Reinforce gate posts with an aluminum insert.
Want to learn more? See our vinyl fence installation page, the wood vs vinyl fence guide, or the top 5 problems with vinyl gates.
Ready to start your project? Learn more about our vinyl fence installation or request a free quote. Call Bryant Fence at (865) 947-9663.